Melted Snowman Coaster: Easy Free Crochet Pattern
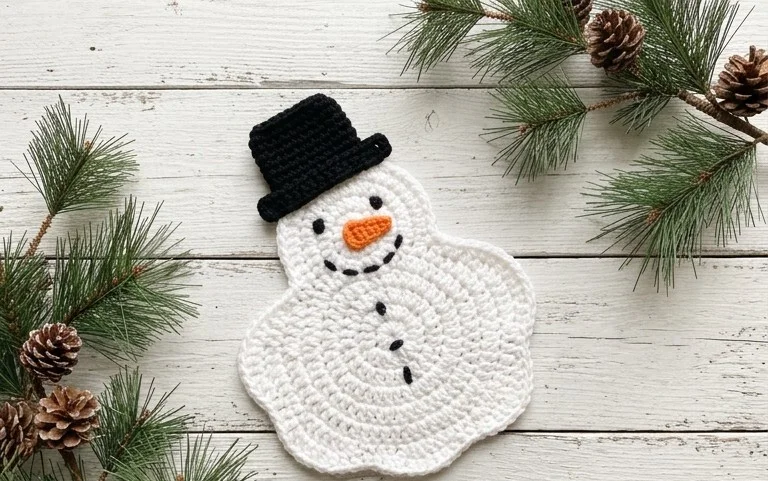
These white cotton circles bring a bit of winter whimsy to your coffee table, resembling a puddle left behind by a forgotten snowman. The dense, flat surface prevents water rings from marring your wooden furniture, making them as practical as they are charming. You will enjoy working with simple stitches that build up quickly, providing a tactile experience that highlights the quality of your yarn. This project serves as a gentle introduction to shaping circular items, helping you understand how to place increases for a perfect, ripple-free finish that lays flat every single time you set your mug down.
Why You’ll Love This Pattern
This beginner-friendly crochet coaster pattern provides a quick and satisfying way to use up those small amounts of leftover cotton yarn in your stash. Because they are worked in simple, continuous rounds, you can easily finish a set of four in a single afternoon, making them a thoughtful, handmade gift for housewarmings or holidays. The sturdy texture of the cotton fabric protects surfaces from condensation while offering a classic, clean aesthetic that fits any home decor style. Since the pattern relies on basic increases, it is an excellent practice piece for those looking to master circular construction before moving on to complex amigurumi.
I managed to whip up a full set of these for my dining room table during a movie night. The pattern is very straightforward and they lay completely flat right off the hook.
— Sarah, home crafter
Pattern Overview & Skill Level
- Skill Level: Beginner
- Approximate Time: 30 minutes per coaster
- Construction: Worked in continuous rounds using basic increases
- Finished Dimensions & Sizing: 4 inches in diameter
Materials & Supplies Needed
- Yarn: Worsted #4 weight, 100% cotton, approximately 15 yards per coaster. Cotton is essential for heat resistance and absorbency.
- Hook Size: 5.0 mm (US H-8) to ensure a tight, dense fabric.
- Notions: Tapestry needle for weaving in ends, a locking stitch marker to track the beginning of your rounds, and scissors.
- Safe yarn substitutions: You may use acrylic yarn, but note that it is not heat-safe and will not absorb moisture effectively. Wool is an alternative for decorative use but requires hand-washing. Using a lighter weight yarn will result in a smaller coaster, while a bulkier yarn will require a larger hook to maintain the same finished size.
Stitch Guide & Abbreviations (US Terms)
- MR: Magic Ring. The starting method for working in the round.
- ch: Chain.
- sc: Single crochet. Insert hook into stitch, yarn over, pull up a loop, yarn over, pull through both loops on hook.
- inc: Increase. Work 2 sc into the same stitch.
- sl st: Slip stitch. Insert hook into stitch, yarn over, pull through stitch and loop on hook.
- st/sts: Stitch/stitches.
Step-by-Step Pattern Instructions
Work in a continuous spiral. Place your stitch marker at the first stitch of each round to keep your place.
- Rnd 1: Start with a MR, work 6 sc into the ring. (6 sts)
- Rnd 2: Work 2 sc in each st around. (12 sts)
- Rnd 3: 1 sc, inc repeat from * to * 6 times. (18 sts)
- Rnd 4: 1 sc in next 2 sts, inc repeat from * to * 6 times. (24 sts)
- Rnd 5: 1 sc in next 3 sts, inc repeat from * to * 6 times. (30 sts)
- Rnd 6: 1 sc in next 4 sts, inc repeat from * to * 6 times. (36 sts)
- Rnd 7: 1 sc in next 5 sts, inc repeat from * to * 6 times. (42 sts)
- Rnd 8: Sc in each st around. (42 sts)
Finishing
To finish, perform a sl st into the next stitch to smooth out the edge. Cut your yarn, leaving a 6-inch tail. Pull the tail through the final loop and use your tapestry needle to weave the end securely into the back of the work. Trim any excess yarn close to the surface to maintain a professional appearance.
Care & Washing Instructions
- Machine wash in cold water on a gentle cycle to prevent shrinking or distortion.
- Lay flat on a clean towel to dry, shaping the coaster into a perfect circle while damp.
- Avoid using fabric softener, which can leave a residue that reduces the natural absorbency of the cotton fibers.
Pro Tips & Common Mistakes to Avoid
Maintaining consistent tension is the most important factor in keeping your coaster flat; if the circle begins to cup or ruffle, your tension is likely too tight or too loose. Always use a stitch marker at the start of your round, as it is easy to lose count in a continuous spiral. When weaving in your ends, run the needle through the stitches on the back side of the coaster at least three times in different directions to ensure the yarn does not pull out with use. If you wish to make a larger coaster, continue the increase pattern by adding one additional stitch between your increases in every subsequent round, though you will need more than one skein of yarn for a set.
Frequently Asked Questions
Can I use a different yarn weight for this project?
Yes, you can use any yarn weight, but you must adjust your hook size to be smaller than the yarn label recommends to achieve a tight fabric. If you use a thinner yarn, your coaster will be smaller, and if you use a thicker yarn, it will be larger.
How do I keep my edges from looking uneven?
Ensure you are pulling your yarn snug after every stitch. At the end of the final round, performing a slip stitch into the next two stitches before fastening off helps create a more gradual transition that avoids a sharp step-down in height.
Is this pattern suitable for complete beginners?
This pattern is perfect for beginners because it focuses on the fundamental concepts of working in the round and increasing. As long as you know how to perform a single crochet and create a magic ring, you can complete this project.
Can I sell the finished coasters?
You are welcome to sell items made from this pattern, provided you credit the designer in your product listings. Always check the specific terms of use provided by the creator if you are selling on platforms like Etsy or at craft fairs.
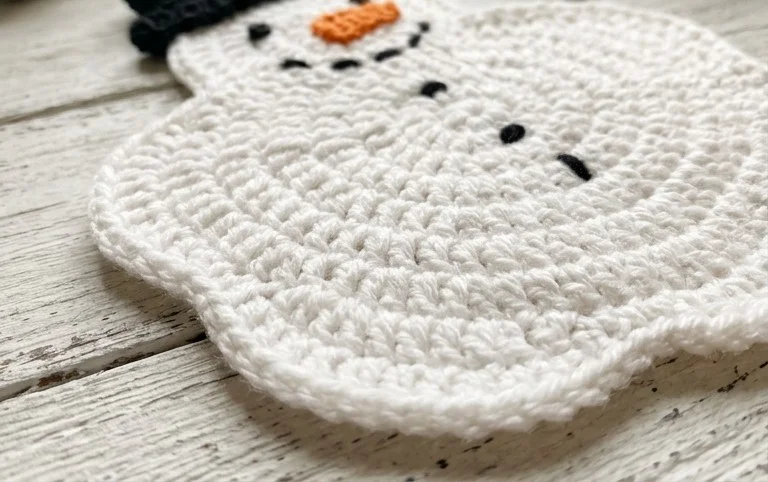
Watching these flat, white shapes pile up in a stack brings a sense of accomplishment to your winter craft sessions. You might try using a sparkle-infused cotton yarn for a glittery ice effect or stitching a tiny orange carrot nose in the center to add more character to your festive decor. Sharing a photo of your finished coasters helps other makers find inspiration for their own holiday tables. Please browse the rest of the blog for more seasonal projects and patterns to add to your handmade collection.