Easy C2C Crochet Stitch Tutorial: Free Step-by-Step Guide
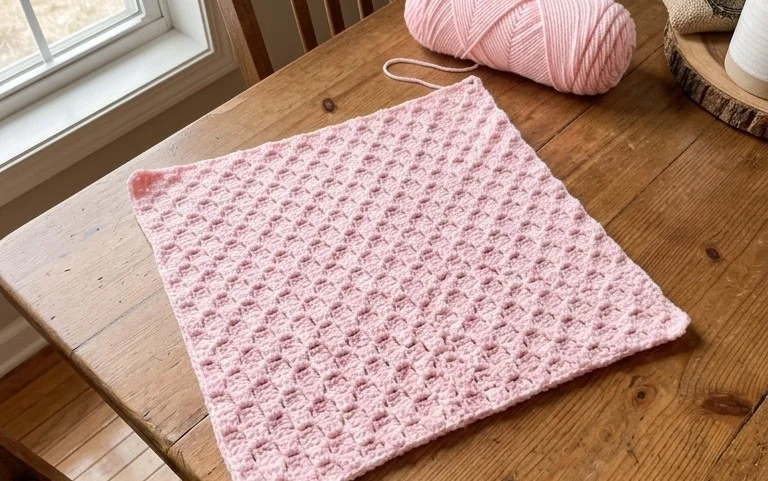
Corner to corner crochet creates a dense, diagonal fabric that feels remarkably sturdy, making it a reliable choice for baby blankets, heavy winter throws, and washcloths. You build this pattern block by block, starting from one corner and increasing until you reach your desired width before decreasing back to the opposite point. This construction style keeps the project portable, as you only ever work on a few small clusters at a time. Beginners often find this method approachable because the stitch pattern repeats every few rows, allowing you to establish a consistent rhythm while you practice your technique.
Why You’ll Love This Pattern
The Classic Crochet Granny Square is the fundamental building block for countless heritage-style blankets, tote bags, and cardigans. This project uses the traditional cluster method, which creates a lightweight yet durable fabric with a distinctively nostalgic aesthetic. You will find this pattern exceptionally quick to work up, as the repeating three-double-crochet cluster sequence becomes rhythmic and meditative within just a few rounds. Because each square is independent, you can easily carry a single skein of yarn and a hook in your bag for portable stitching during travel or commutes. It is an excellent way to use up small amounts of leftover yarn, allowing you to create vibrant color-blocked designs without needing to purchase full skeins for every round.
I finally mastered the center join after struggling for months. This pattern is clear, the stitch counts are spot on, and my squares are laying perfectly flat at last.
— Sarah, hobbyist crafter
Pattern Overview & Skill Level
- Skill Level: Beginner
- Approximate Time: 30–45 minutes per 6-inch square
- Construction: Worked in rounds starting from a center ring, turning not required
- Finished Dimensions: Approximately 6 inches square when using worsted weight yarn and a 5.0 mm hook
Materials & Supplies Needed
- Yarn: Worsted weight (#4), 100% wool or acrylic, approximately 20 yards per square.
- Hook Size: 5.0 mm (US H-8).
- Notions: Yarn needle for weaving ends, sharp scissors.
- Yarn Substitutions: You may use cotton yarn for a stiffer, more defined texture; note that cotton lacks the “bloom” of wool and may result in a slightly smaller square. Using a lighter DK weight yarn with the same hook will create a delicate, smaller square with open spaces.
Stitch Guide & Abbreviations (US Terms)
- ch: chain
- dc: double crochet
- sl st: slip stitch
- sp: space
- Cluster: A group of 3 dc stitches worked into the same chain space.
- Magic Ring: A circular starting method that allows the center to be pulled tight.
Step-by-Step Pattern Instructions
Center and Foundation
- Rnd 1: Start with a Magic Ring. Ch 3 (counts as first dc), work 2 dc into the ring, ch 2, 3 dc into ring, ch 2 3 times. Join with a sl st to the top of the beginning ch-3. (12 dc, 4 ch-2 spaces)
Expanding the Square
- Rnd 2: Sl st into the next 2 sts and into the first ch-2 corner space. Ch 3, 2 dc, ch 2, 3 dc in same corner space. Ch 1, (3 dc, ch 2, 3 dc) in next corner space 3 times. Ch 1, join with a sl st to the top of the beginning ch-3. (24 dc, 4 ch-2 corner spaces, 4 ch-1 side spaces)
- Rnd 3: Sl st into the next 2 sts and into the first ch-2 corner space. Ch 3, 2 dc, ch 2, 3 dc in same corner space. Ch 1, 3 dc in next ch-1 side space, ch 1, (3 dc, ch 2, 3 dc) in next corner space 3 times. Ch 1, 3 dc in next ch-1 side space, ch 1, join with a sl st to the top of the beginning ch-3. (36 dc, 4 ch-2 corner spaces, 8 ch-1 side spaces)
- Rnd 4: Continue the pattern established in Rnd 3, working 3 dc in every side ch-1 space and (3 dc, ch 2, 3 dc) in every corner ch-2 space. Join with a sl st. (48 dc, 4 ch-2 corner spaces, 12 ch-1 side spaces)
Finishing
Fasten off yarn, leaving a 6-inch tail. Use your yarn needle to weave the tail through the back of the stitches to secure it. If making multiple squares to join, leave a longer tail if you intend to use the whip stitch method for assembly.
Care & Washing Instructions
- Hand wash in cool water with a mild wool-safe detergent to maintain fiber integrity.
- Gently squeeze out excess water using a towel; do not wring or twist the square, as this can distort the shape.
- Lay the square flat on a clean surface, reshaping it to a perfect square while damp to ensure the corners are sharp.
Pro Tips & Common Mistakes to Avoid
- Consistent Tension: Double crochets can easily become loose. Keep a firm grip on your working yarn to ensure your clusters remain uniform in size throughout the rounds.
- Marking Your Rounds: Always place a stitch marker in the top of your starting ch-3. This prevents you from accidentally skipping the final stitch of the round when joining.
- Weaving Ends: Weave your yarn tails in multiple directions through the back loops of the stitches. This prevents the ends from popping out through the front of the square after repeated washing.
- Adjusting Size: To make a larger square, simply repeat Rnd 4 additional times. Each additional round increases your total stitch count by 12 dc, which will require more yardage per square.
Frequently Asked Questions
Can I substitute acrylic for wool in this pattern?
Yes, acrylic is a durable and affordable alternative. It will behave similarly to wool in terms of drape, though it does not block as effectively as natural fibers.
Why are the edges of my square curling?
Curling usually indicates that your tension is too tight or your hook size is too small for the yarn weight. Try moving up to a 5.5 mm hook if the curling persists after blocking.
Is this pattern suitable for complete beginners?
It is highly recommended for beginners because it uses only basic chains and double crochet stitches, which are the foundational techniques for most crochet projects.
May I sell the items I create using this pattern?
Check the specific copyright terms provided by the pattern designer. Generally, individual makers can sell finished items, but redistributing or selling the pattern document itself is prohibited.
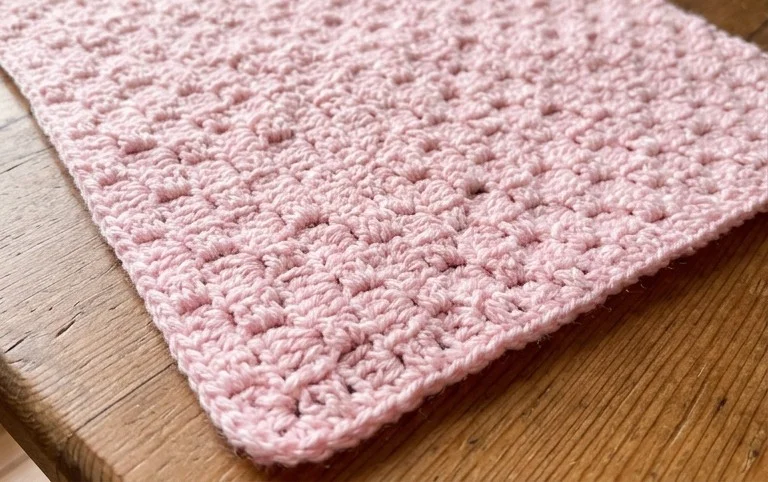
Seeing your diagonal blocks grow from a single square into a soft, textured blanket provides such a satisfying sense of accomplishment. You might consider using a variegated yarn for your next attempt to watch the colors shift naturally across the diagonal rows without needing to change skeins frequently. Please share a photo of your finished work on social media so others can see your progress. Feel free to browse through the rest of the blog archives for more free stitch tutorials and project ideas for your home.