Crochet Fingerless Gloves & Beanie Set: Easy Free Pattern
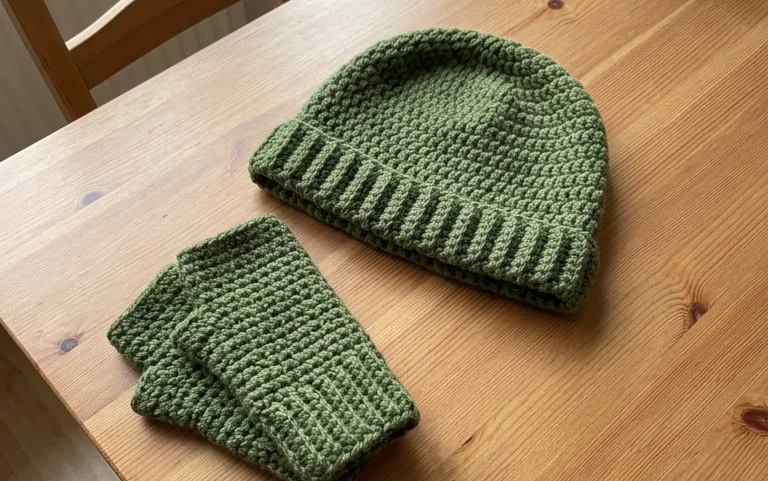
Soft wool against your skin provides instant relief when the first autumn chill hits the morning air. This matching set offers a cozy barrier between you and the frost, keeping your head warm while allowing your fingers full freedom for texting or holding a steaming mug of tea. Making these accessories is a straightforward process that relies on the half-double crochet stitch to create a supple, wind-resistant fabric. You will learn to shape the crown of the hat and construct a snug thumb hole for the gloves, resulting in winter staples that look store-bought but cost only a few skeins of yarn.
Why You’ll Love This Pattern
This classic crochet dishcloth works up quickly using the thermal stitch, a dense construction technique that creates a thick, double-layered fabric ideal for scrubbing heavy-duty messes. Because it uses a simple repeating pattern, you can easily complete a full set in a single weekend while practicing your tension. The finished square is sturdy, heat-resistant, and maintains its shape even after repeated trips through the washing machine. Cotton yarn provides the necessary absorbency for kitchen use, and the textured surface effectively lifts grime without scratching delicate cookware.
I made four of these in one afternoon for my kitchen, and they hold up much better than the store-bought ones that always fall apart in the wash.
— Sarah, home cook
Pattern Overview & Skill Level
- Skill Level: Beginner
- Approximate Time: 1 hour per cloth
- Construction: Worked in flat rows using the thermal stitch technique
- Finished Dimensions: 8 inches by 8 inches
Materials & Supplies Needed
- Yarn: Worsted weight (#4) 100% cotton yarn, approximately 85 yards per dishcloth.
- Hook Size: 5.0 mm (H-8) crochet hook.
- Notions: Tapestry needle for weaving in ends, scissors.
- Safe Yarn Substitutions: Linen or bamboo-cotton blends are excellent alternatives. Avoid acrylic, as it lacks the absorbency required for kitchen cleaning and may melt if used on hot surfaces.
Stitch Guide & Abbreviations (US Terms)
- ch = chain
- sc = single crochet
- st(s) = stitch(es)
- BLO = back loop only
- FL-below = front loop of the stitch from the row below. This is the foundation of the thermal stitch.
Step-by-Step Pattern Instructions
Foundation and Base Row
The thermal stitch relies on working into two layers simultaneously. You will start with a standard foundation and then transition to the thermal method.
- Row 1: Ch 30. Sc in the second ch from the hook and in each ch across. (29 sts).
- Row 2: Ch 1, turn. Sc in the BLO of each st across. (29 sts).
Main Body (Thermal Stitch)
From this point forward, you will work into both the back loop of the current row and the remaining front loop from the row below.
- Row 3: Ch 1, turn. Insert your hook into the BLO of the current stitch and the unworked FL-below from the previous row. Yarn over and pull through both, complete as a standard single crochet. Repeat this across the entire row. (29 sts).
- Rows 4–35: Repeat Row 3 until the piece measures 8 inches square. (29 sts).
Finishing
After reaching your desired length, fasten off by cutting the yarn and pulling the tail through the final loop. Use a tapestry needle to weave the loose ends securely into the dense fabric. Because the thermal stitch is double-thick, you can run the needle through the center layers to hide the yarn ends completely.
Care & Washing Instructions
- Machine wash on a warm, gentle cycle with like colors to prevent dye bleeding.
- Tumble dry on low heat or lay flat on a drying rack to prevent shrinkage.
- Do not use fabric softener, as it leaves a waxy residue that reduces the absorbency of the cotton fibers.
Pro Tips & Common Mistakes to Avoid
- Tension: Since the thermal stitch is dense, maintain a slightly looser tension than usual to keep the fabric flexible rather than stiff.
- Stitch Markers: Place a stitch marker in the first stitch of every row to ensure you do not accidentally skip the end of the row, which keeps the edges perfectly straight.
- Weaving Ends: Always weave your tail in at least three different directions within the center of the cloth. This ensures the ends stay locked in place even after heavy scrubbing.
- Adjusting Size: To make a larger or smaller cloth, simply increase or decrease your starting chain by an odd number. Keep in mind that a larger cloth will require additional yardage.
Frequently Asked Questions
Can I use variegated yarn for this pattern?
Yes, variegated cotton yarn works beautifully here. It adds visual interest to the dense, uniform stitches without requiring any color changes.
Why does my dishcloth look uneven on the sides?
If the edges are curling or uneven, you are likely missing the final stitch of the row. Counting your stitches at the end of each row ensures your edges remain crisp and straight.
Is it possible to sell finished items made from this pattern?
You are welcome to sell physical dishcloths you have personally crocheted using this pattern. Always credit the design when listing your items online.
Is this project suitable for someone who has never crocheted before?
If you are comfortable with the basic single crochet stitch, you can certainly complete this. The thermal technique is simply a variation of the single crochet that adds depth and density.
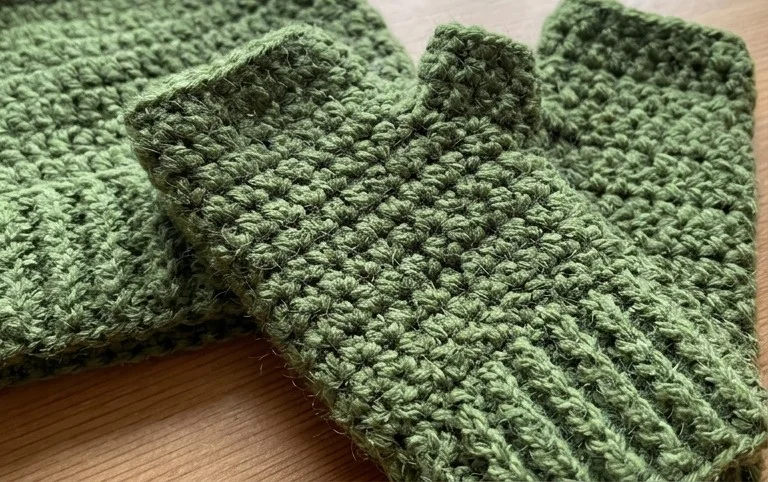
Your finished set keeps your head and wrists toasty during the coldest months of the year. Try using a variegated wool yarn if you want to add a bit of visual depth without changing your hook or basic technique. I love seeing the different color palettes people choose for these projects, so feel free to upload a photo of your work to your favorite social media site. You can find more free patterns for warm winter accessories by browsing through the archives on my blog whenever you need your next project.